How to add recaptcha in contact form 7
Most people tend to confuse between reCaptcha and really simple captcha. ReCaptcha is the default captcha solution that appears prior to 4.3 whereas really simple captcha can be termed as a WordPress plugin designed and maintained for about 8 years now. ReCaptcha in simple terms, it’s a google service loaded with tremendous pros when compared to a really simple captcha. If you want to get started with reCaptcha, then it’s vital to have a google account, with the account you will be able to your site to access an API key pair.
Contact 7 is one of the popular contact forms used for plugins in WordPress. Combining the 2 can easily link to a WordPress contact form that is secure from spam. Many people who own websites in most cases have an impression that Google reCaptcha is a tedious and hard task to handle and this is not always the case. In the blog below, let’s learn step by step how to add ReCaptcha in contact form 7 and you will notice how simple it is.
Install contact 7 plugin form
The first thing you need to do is log in to your well-designed WordPress site
Go to plugins and add a new search for Contact for 7.
The next stage is to click on Install now. It’s located at the far end on right at the top.
Activate the plugin.
Generate a reCaptcha public and secret keys
This is the second step of adding reCaptcha in the contact form. The most important thing needed at this stage is to generate keys to be used in your domain.
Log in to a google reCaptcha site
Identify the button named Get ReCaptcha and click on it.
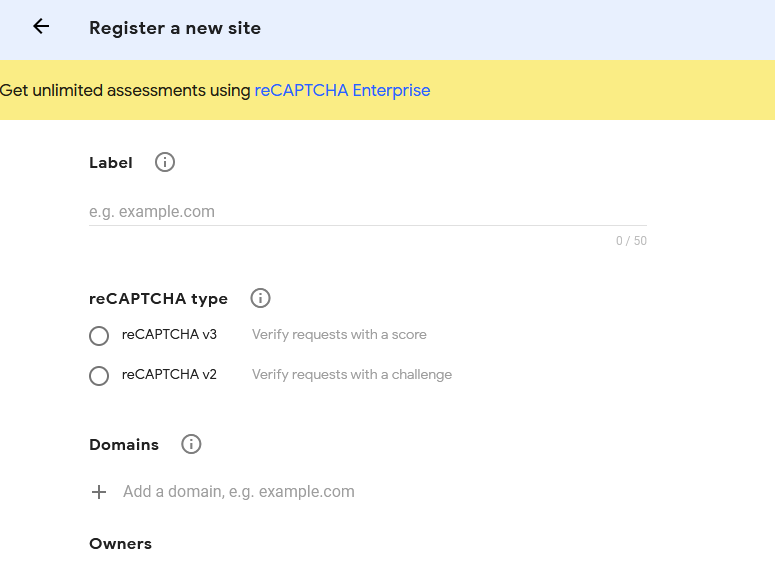 Next is to insert your site details in the blanks provided, details needed are such as label, email owner, and the domain.
Link the reCaptcha with contact form 7
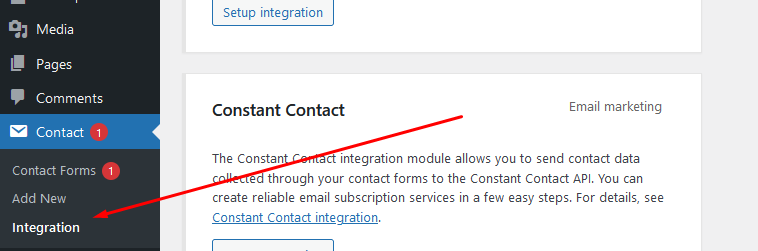
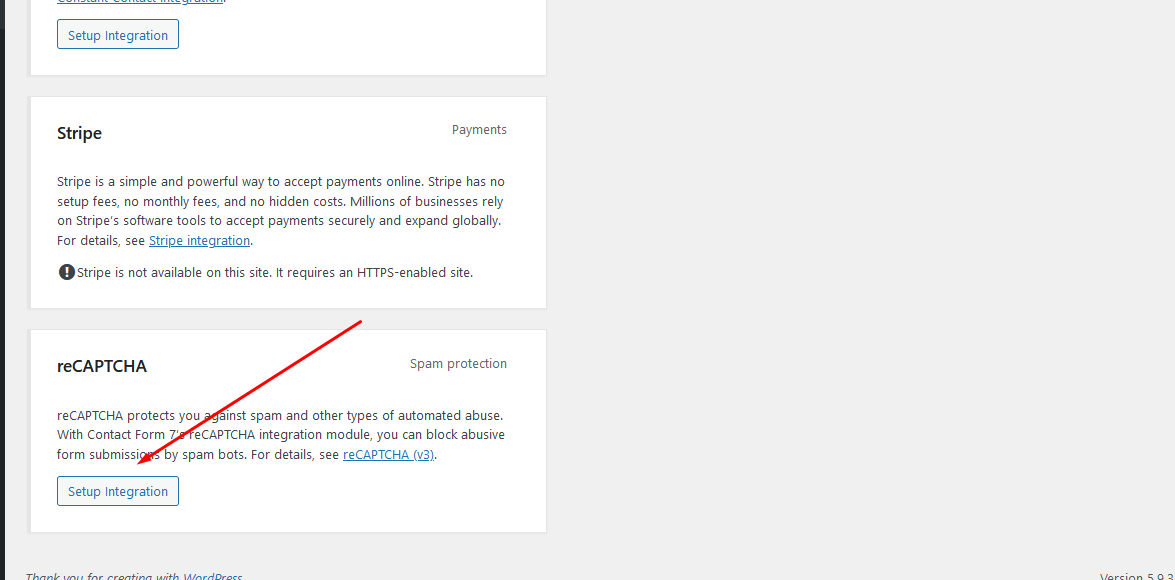
At this, you’re already logged into your WordPress dashboard, so visit the contact form 7 then move to integration.
The next step is to type the Site key and Secret key. In this case, just make use of the ones you had earlier generated in the second step.
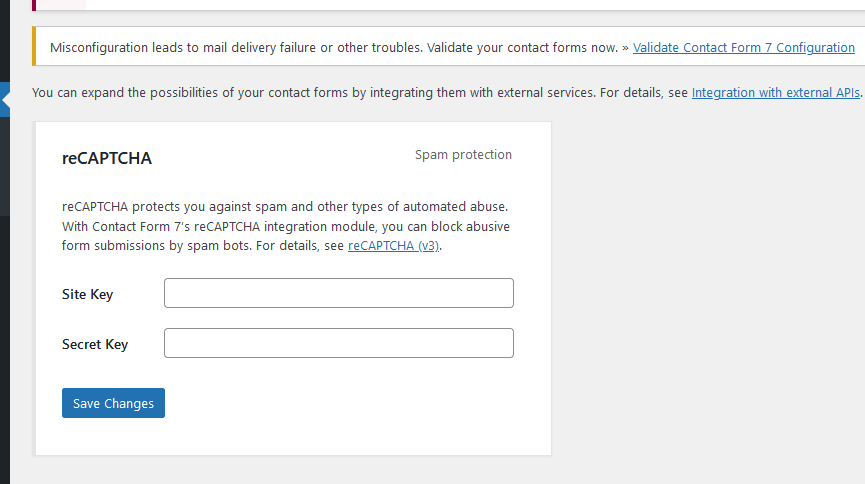
After completion ensures to save all that you’ve done.
Editing of the default contact form
During installation by default, a process that was done at the first stage, a form containing basic fields is created.
Locate contacts, then contact forms and your form.
At this point, a shortcode will appear. Paste that shortcode to render the reCaptcha space then presses the submit button.
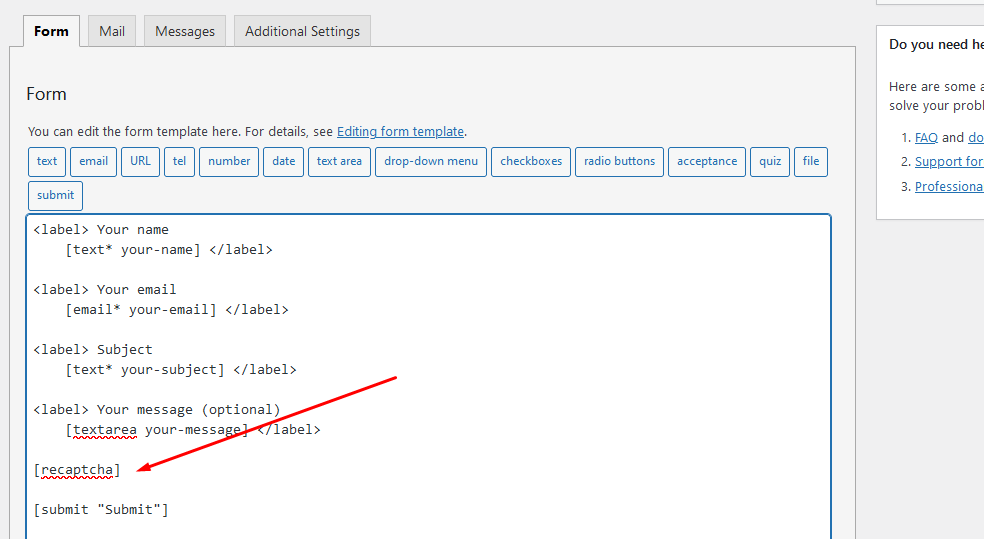
Go to the save button and click on it. This ensures that all you’ve done has been captured and saved into the system.
Next is to embed the contact form in the web page
First, go to contacts then contact forms
Copy the shortcode that is displayed on the form
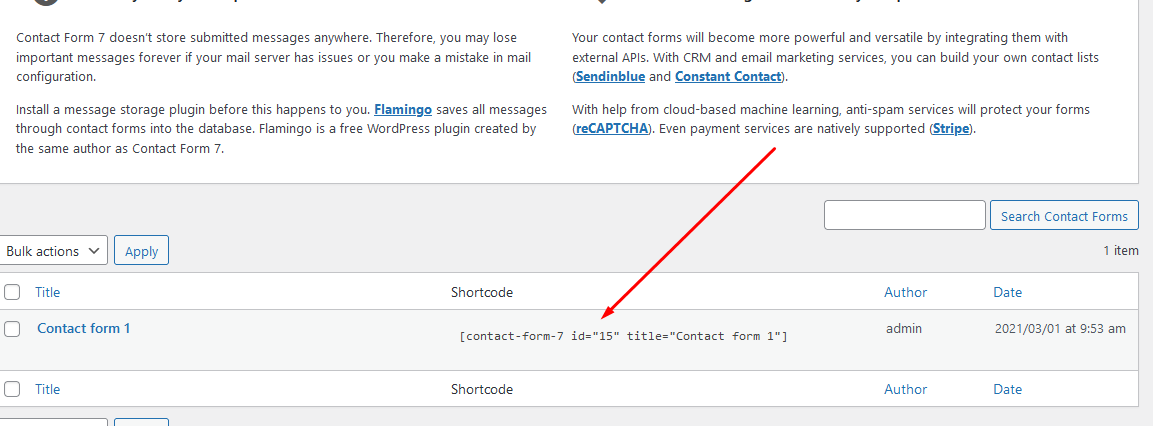
Head to the pages and press on Add New
At this point paste the shortcode you had copied.
Then you need to publish the page.
Have an overview of the end results
Preview the contact page and have a look at its appearance
Then add a plugin reCaptcha for the contact form generated
On the dashboard, locate a reCaptcha version then select the reCaptcha usage dropdown menu, then click on reCaptcha version 2, and then submit.
After you’ve completed all the steps above, refresh your site and you will be in a good position to see all that you’ve been doing on your site.
You will locate your contact form aligned with your reCaptcha and you’re done with the process.
Summary
Follow the procedures stated above to link a reCaptcha to your contact 7 form. The initial step to take is to register into your domain and come up with a site and a secret key. Then make use of the shortcode in adding to the reCaptcha. Installing a reCaptcha to your contact form 7 is quick and easy. Practice doing the above step and you will be in a position to state how easy it is. ReCaptcha adds security to your reCaptcha so don’t neglect it. After grasping, you can share the same with your friends who have a WordPress, and remember to reach out for more aid if you find it difficult. Contact customer care for assistance in case you get stuck.
How to Disable the Language Switcher on WordPress Login Screen

How to debug error in WordPress Ajax Request
What is a Multisite and how to create WordPress network?
About Author
MD Hamidul Islam
Add a Comment
You must be logged in to post a comment.
One Comment