How to Change WooCommerce Checkout Fields Order
If you are running a store with WooCommerce, the checkout system plays a critical role in customer conversions. Woocommerce By default arranges checkout fields in a specific order, First of all, comes with billing details, shipping information, and payment options. However, Sometime Store owners need to rearrange these checkout page fields to fit with their business requirements and create an easy step for customers to complete orders easily. In this article, we will explain two ways to change the WooCommerce checkout fields, one using coding and the other through a different plugin.
Method 1: Reorder Checkout Fields by coding
If you have experience in working with coding and you know the at last basics of PHP language, you can customize the checkout fields by using your theme’s functions.php file or a custom plugin. Here’s how to do it:
Step 1: Access To the WordPress Theme Folder
Log in to your WordPress Dashboard using your administrator credentials and Go to the Appearance > Theme File Editor. if you have FTP details, you can access the theme file folder by FTP, just download WinSCP, and log in with your FTP account Details. and go to wp-admin/theme/ and your active theme file.
Step 2: Open Theme’s functions.php in File Editor
If you are using a child theme, open the functions.php file of your child theme. Or if you are using the main theme, All your custom coding will be gone when your theme will get update to a newer version.
Step 3: Use the WooCommerce Filter Hook to Reorder Checkout Field
To reorder the checkout fields, we will use the “woocommerce_checkout_fields” filter hook. This filter will up and down the checkout field by setting the priority of the field. Checkout the below Example, this example is for reorder billing section field, you need to just change priority number.
add_filter("woocommerce_checkout_fields", "thedailywp_override_checkout_fields", 1);
function thedailywp_override_checkout_fields($fields) {
    $fields['billing']['billing_first_name']['priority'] = 1;
    $fields['billing']['billing_last_name']['priority'] = 2;
    $fields['billing']['billing_company']['priority'] = 3;
    $fields['billing']['billing_country']['priority'] = 4;
    $fields['billing']['billing_state']['priority'] = 5;
    $fields['billing']['billing_address_1']['priority'] = 6;
    $fields['billing']['billing_address_2']['priority'] = 7;
    $fields['billing']['billing_city']['priority'] = 8;
    $fields['billing']['billing_postcode']['priority'] = 9;
    $fields['billing']['billing_email']['priority'] = 10;
    $fields['billing']['billing_phone']['priority'] = 11;
    return $fields;
}
This example is for the shipping section:
add_filter("woocommerce_checkout_fields", "thedailywp_override_checkout_fields", 1);
function thedailywp_override_checkout_fields($fields) {
    $fields['shipping']['shipping_first_name']['priority'] = 1;
    $fields['shipping']['shipping_last_name']['priority'] = 2;
    $fields['shipping']['shipping_company']['priority'] = 3;
    $fields['shipping']['shipping_country']['priority'] = 4;
    $fields['shipping']['shipping_state']['priority'] = 5;
    $fields['shipping']['shipping_address_1']['priority'] = 6;
    $fields['shipping']['shipping_address_2']['priority'] = 7;
    $fields['shipping']['shipping_city']['priority'] = 8;
    $fields['shipping']['shipping_postcode']['priority'] = 9;
    $fields['shipping']['shipping_email']['priority'] = 10;
    $fields['shipping']['shipping_phone']['priority'] = 11;
    return $fields;
}
if you want to change to address field order, you can use this filter to do it
add_filter( 'woocommerce_default_address_fields', 'custom_override_default_locale_fields' );
function custom_override_default_locale_fields( $fields ) {
    $fields['state']['priority'] = 5;
    $fields['address_1']['priority'] = 6;
    $fields['address_2']['priority'] = 7;
    return $fields;
}
Method 2: Reorder Checkout Field by Plugin
if you don’t know about coding or prefer the more easy way to do it, you can do it by the plugin, there is many plugins to do it, but we will use This PluginCheckout Field Editor (Checkout Manager) for WooCommerce.
Step 1: Install and Active the Plugin
Go to your WordPress Admin Panel, Click “Plugins” From the left side menu and click on “Add New,” and search for “Checkout Field Editor (Checkout Manager) for WooCommerce”, Install and activate the plugin.
Step 2: Go to Plugin Setting
After activation, Go to the plugin settings From the left side menu Woocommerce > Checkout Form”.
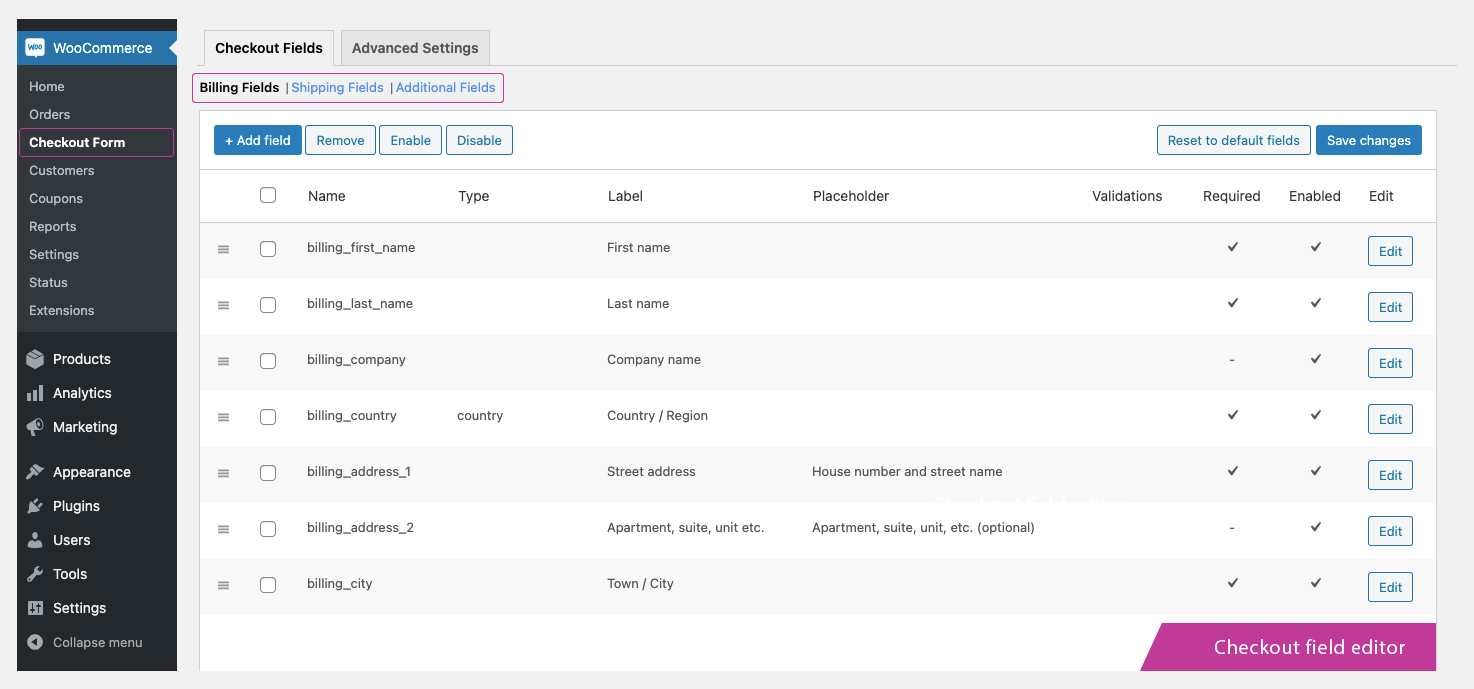
Step 3: Reorder Checkout Fields
In this Plugin Setting you can drag and drop the checkout form field to reorder the fields, as well there is billing and shipping sections. as you can manage both of them. there is also advance system to create another sections. you can also add custom input field in all section. according to as your need. also you can rename existing fields.
Conclusion:
By customizing the order of checkout fields in WooCommerce, you can create a more personalized and streamlined shopping experience for your customers. This tutorial presented two methods to reorder your checkout fields, one using coding, adding woocommerce defaults filters and the other using a plugin like “Checkout Field Editor (Checkout Manager) for WooCommerce”. Whether you prefer a hands-on coding approach or a user-friendly plugin solution, these methods offer the flexibility to tailor the checkout process to suit your business needs and improve customer satisfaction. Select the method that aligns with your skill level and website requirements, and enjoy a more optimized and customer-centric checkout journey for your online store.

How to Turn Off Comment on WordPress

How to set Dynamic Select List in Contact Form 7